
Recently, I was asked about my craft area. Did I have my own room? How do you handle storage? Lighting?
Here’s a glimpse into my world.My art space has gone through several transformations.
Here’s a glimpse into my world.My art space has gone through several transformations.
 Above is the view from utility portion of the space. My back is pressed against the water heater as I took the picture.
This area has remained mostly unchanged. I have TONS of stuff within reach when I sit in the “command chair”. I use the cute Chicks Rule bucket to hold my scraps. My little girl was kind enough to let me use it. Thanks sweetie!
I have a small florescent fixture that hangs for direct task lighting. There is also a large florescent fixture smack in the middle of the room that provides light but since it’s behind me when I work, I tend to create a shadow for myself. Fabulous…

I love my Pampered Chef tool organizer. I know it’s meant for kitchen stuff but it is perfect for all my “go-to” items. I use a self-healing cutting mat to protect my counter top. The stamp pad and ribbon storage rack was bought on eBay a couple years ago. Can’t image what I did without it!

This cabinet was the latest piece we added to the space. I sold the old TV stand that was here to make room for this.

Now I have a standing working surface as well!! I love it.

Look at the rolling shelves! Awesome storage!

My husband put up this cabinet several years ago to help control my creative clutter. I have it jammed full as well. Although, I do know where every single thing is!

This is how I store my 12×12 scrapbook papers. Not the prettiest system but it works for me. Your eyes do not deceive you either…yet another storage piece under the counter top. It’s on wheels so I can pull it out to store my sewing machine behind it when not in use. I didn’t take a picture but there is also a tiny 2 shelf bookcase under the counter. It was way to messy for a photo.

The large orange file cabinet is also “new”. To me at least. It came from my folks place along with the cabinet. The top 2 drawers just boring administrative stuff.
Oh, did I mention my craft area is in the laundry room… The dryer makes a great spot for my guillotine cutter.

But the bottom one holds all my scrap sorted by color and other ephemera.Well, that’s probably more than you ever cared to know about where I work. Now I should probably start using my space instead of just talking about it!

Just because I felt like playing…


I have no idea what or how or even IF I’m going to use any of these items but I put them all together in my own little treasure box.
Just look at the tiny little glasses! Real glass lenses.
An itty-bitty sterling silver spoon…
A mini pocket knife.
Treasures.


I’ve been finding all kinds of interesting little treasures lately. Such as a sterling spoon that had no handle. I put the stub of the handle in the vise and slowly started working it into a loop.
I love steampunk so I used some gears and the heart goes with the word LOVE. The heart is from an earring. Next time I try something like this I want to use resin. This was Diamond Glaze, which I’m pretty sure isn’t supposed to be used as I tried.
It is a fun little piece though. No mistakes… just opportunities to learn.

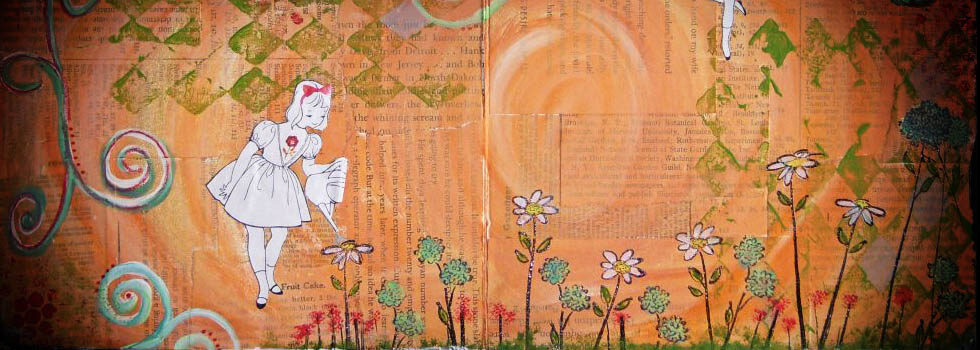
Feeling the need to do something creative, I cleaned off my workspace and grabbed my pile of book text scraps. The substrate is cardboard packaging that I obsessively save.
I decided to try out my UHU glue stic for this experiment. I knew I wanted to play with my watercolor crayons but have had issues with other glues releasing the papers from the substrate after getting wet. While wet there was a slight amount of lifting or warping but to my great delight, it dried completely flat! I believe I have found a new glue for this technique.
I’m loving the layered look. I used watercolor crayons, paint, correction pen, metallic marker, colored pencil, China crayon and rubber stamps on this piece.
 I found these bowls at my folks house and asked if I could have them. I didn’t mention what I intended to do with them. I’m guessing I wouldn’t have been given the blessing to take them if mom had known I’d be breaking them.
I put on a face shield and went to work over the outside garbage can with my tile nippers. Cutting up dishes is a messy job!
I started with the Merlot bowl since we don’t like Merlot. It was my trial piece. I was able to figure out how the bowl would break without ruining the ones I intended to use.
I knew I wanted to use this frame.
It previously looked like this. It hung by the front door for several years but now my collage frame hangs in the spot. That meant it was time for a makeover.