Tag : acrylic pour

6 posts

I know its taken a while but I’m finally going to show you how I do my acrylic pours.  (This is a photo heavy post)acrylic pour walk through

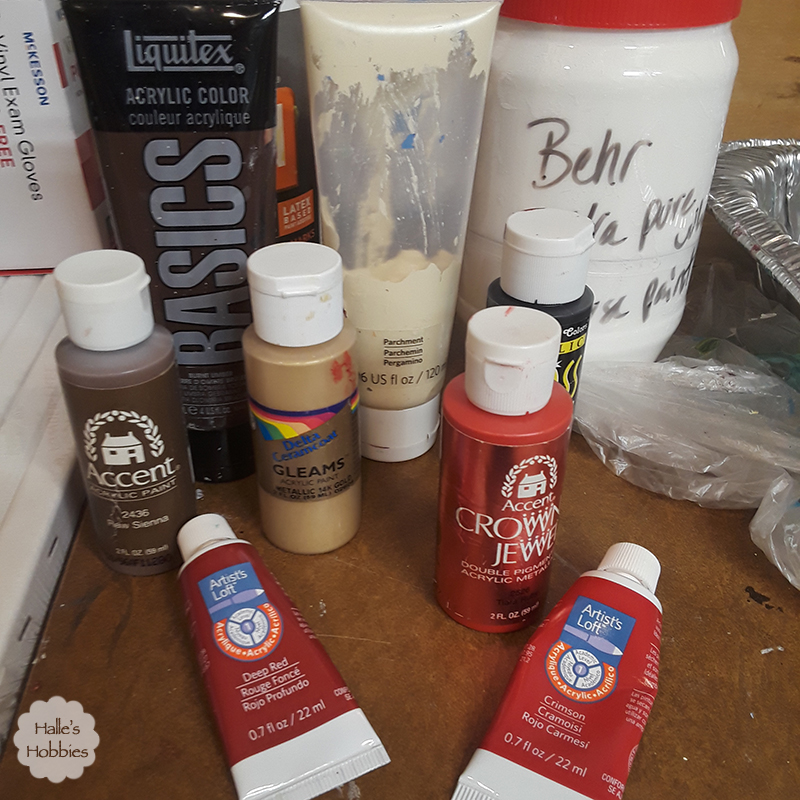
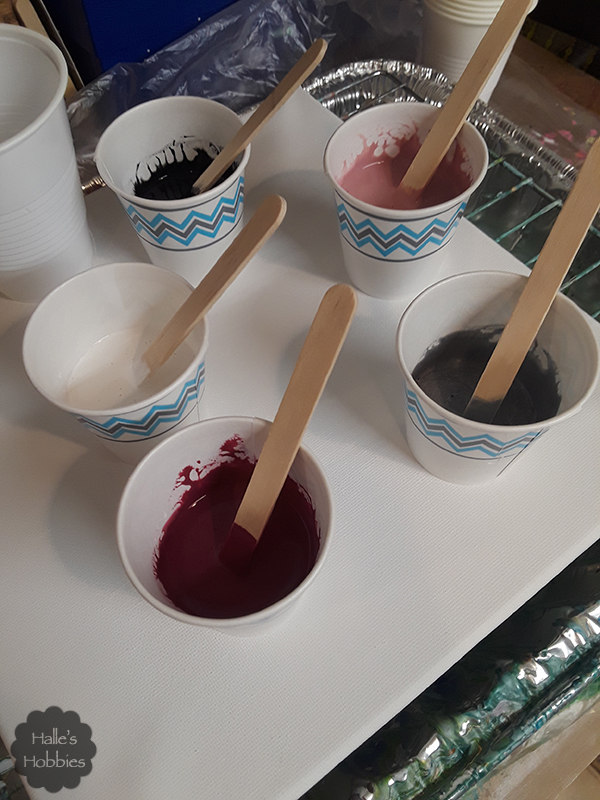
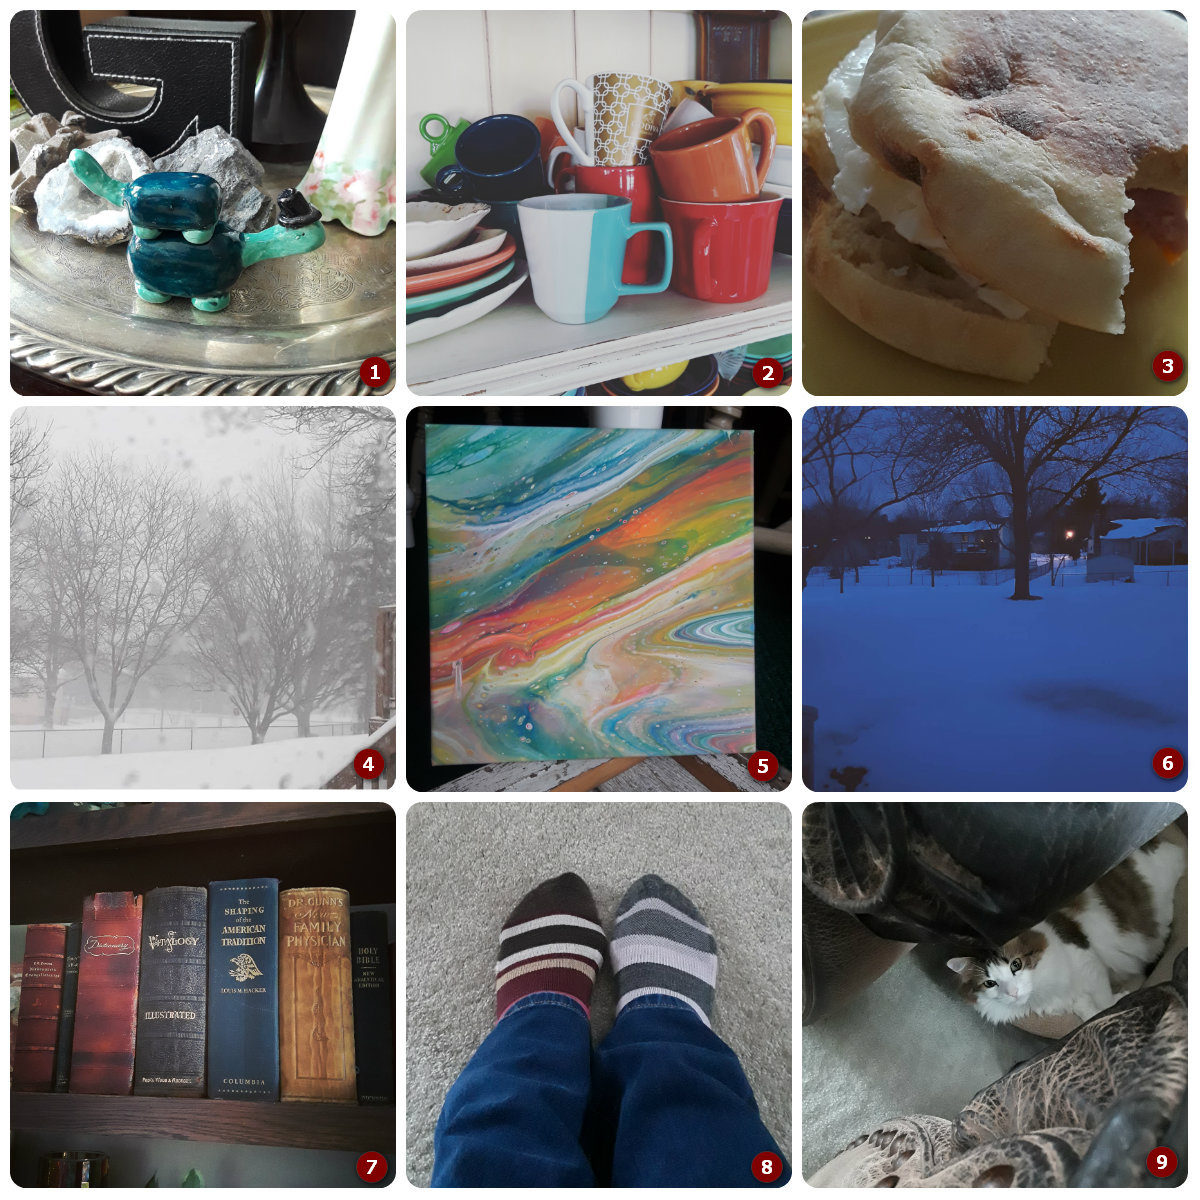
Lets talk about the colors I used first off.  I use all brands of paint, even house paint for my pours. I really only care about the color I achieve in each cup. I mixed the 2 browns until the color felt right. I did the same with the 2 reds in the right of the photo.

acrylic pour walk through

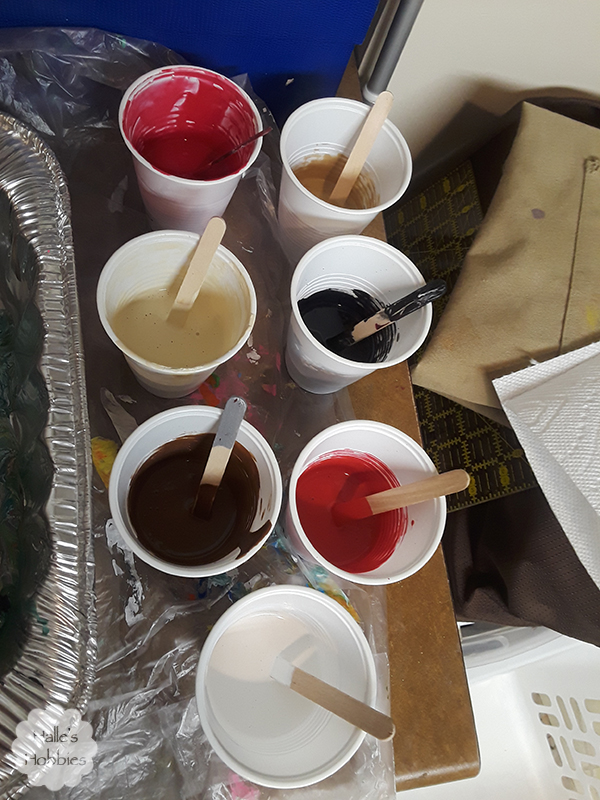
In all I have 7 colors. As I’m mixing these I add a product called Floetrol, which is a paint conditioner. I plan to use some of this in my paint for the front door…hopefully eliminating my brush strokes.

acrylic pour walk through 
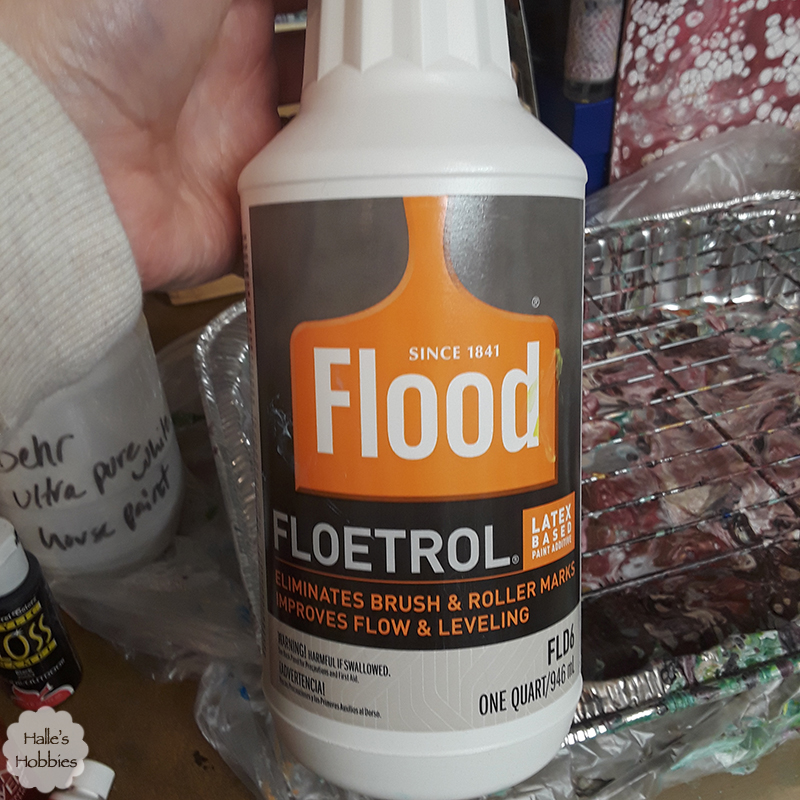
I use about a 50/50 mix of paint and Floetrol. I eyeball it…this girl doesn’t measure. If the paint is still quite thick (which is almost always is) I add distilled water very slowly until I get the proper consistency. For me that is the paint running in a thin line from my stir stick. acrylic pour walk through

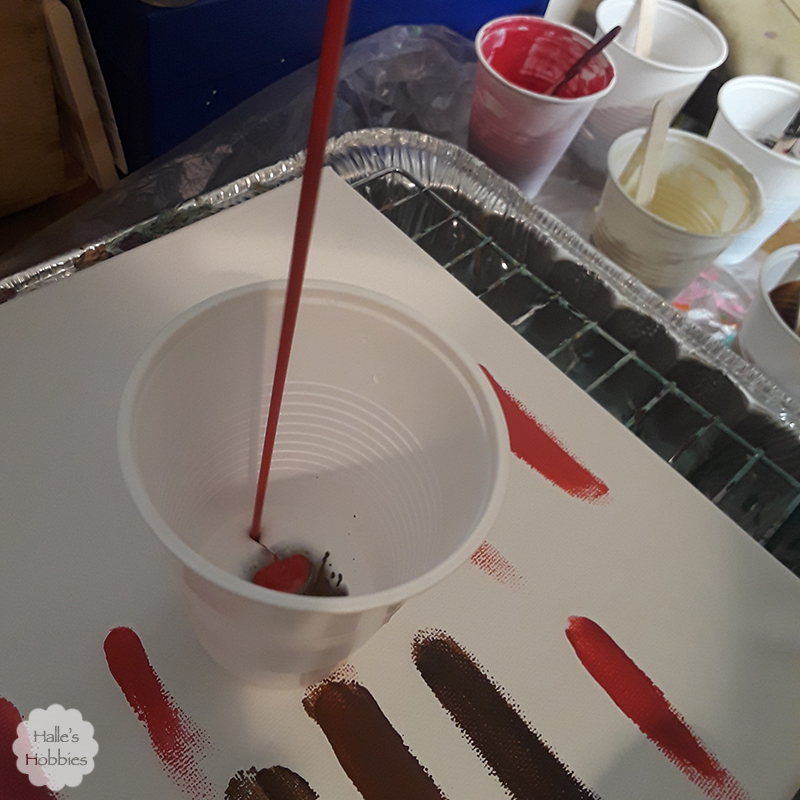
Now comes the dirty pour part. I always start with a small amount of white in the bottom of the cup then begin adding streams of color in a varied order. I pour from different heights which distributes the color in the cup in different ways.acrylic pour walk through

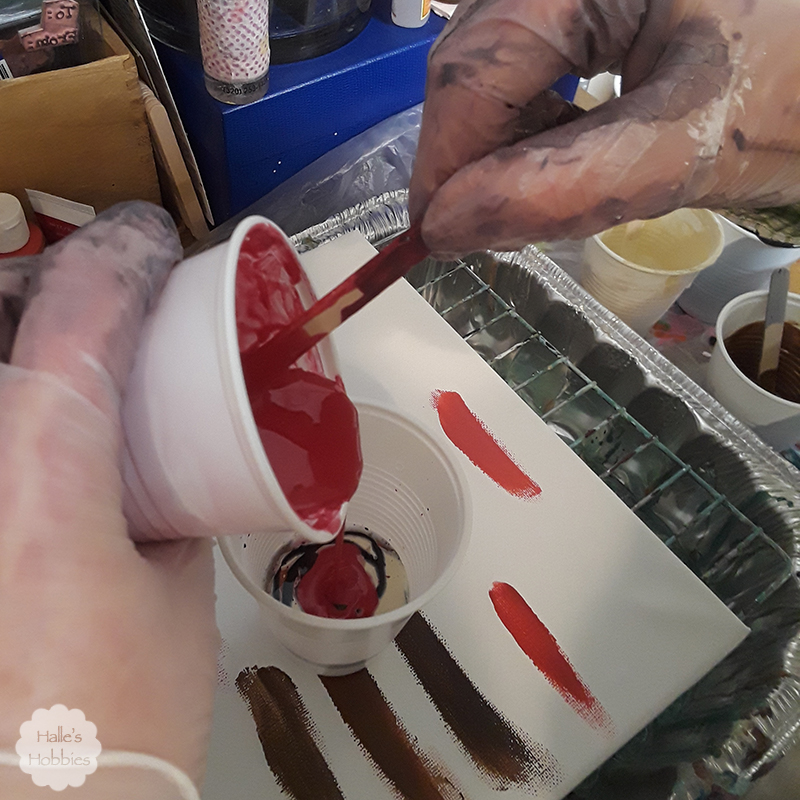
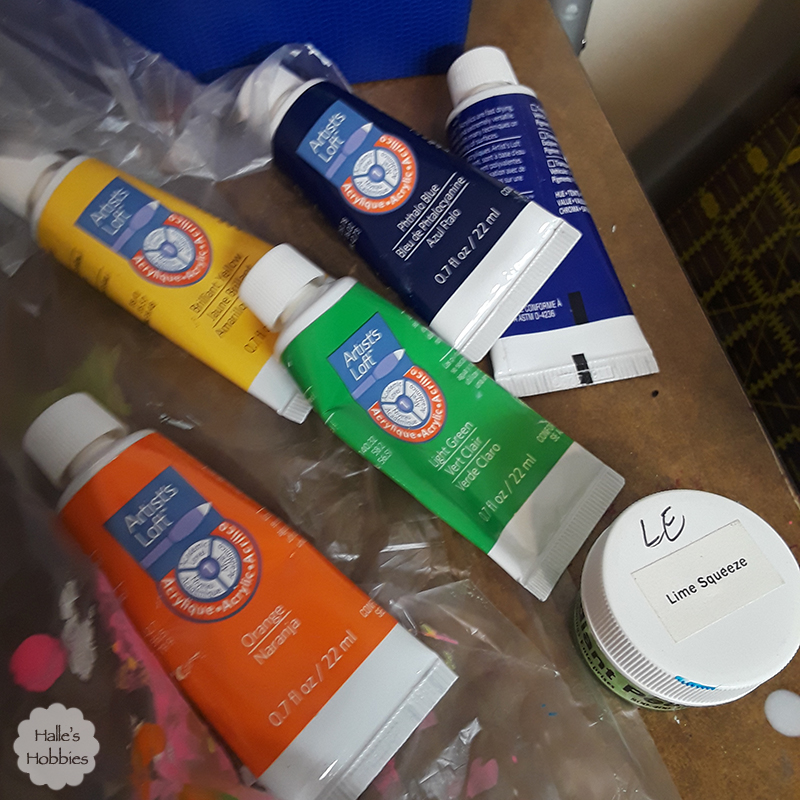
As you can see I tried out colors from my paint drawer on the canvas before preparing my cups. It doesn’t matter what is on the canvas before so feel free to reuse an old canvas. After filling the cup with enough paint or what I assume is enough…remembering that some paint will be poured off the edge in this process….I’m ready to pour or flip as the case may be.acrylic pour walk through

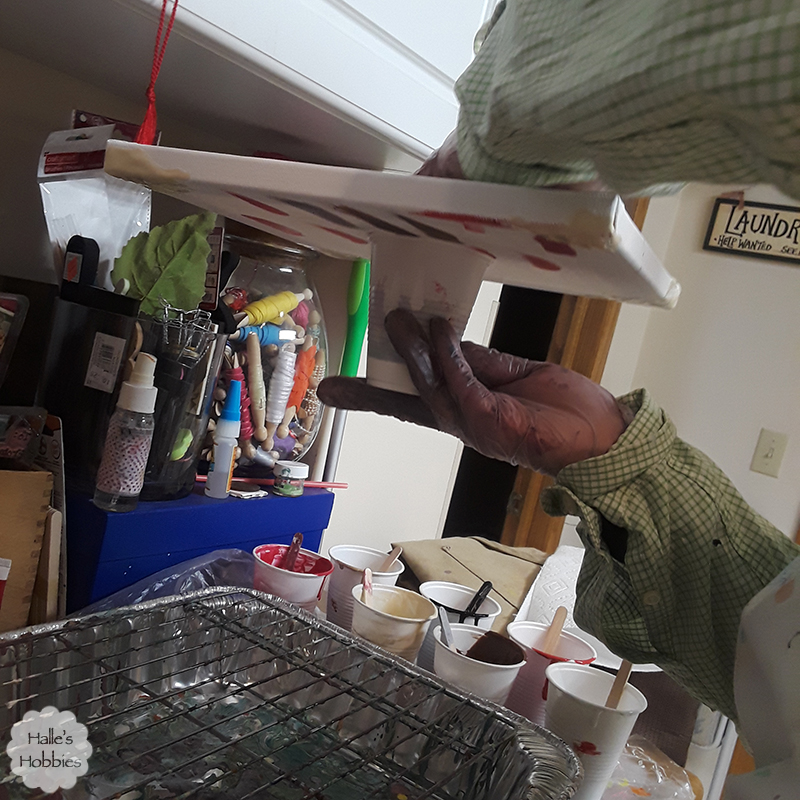
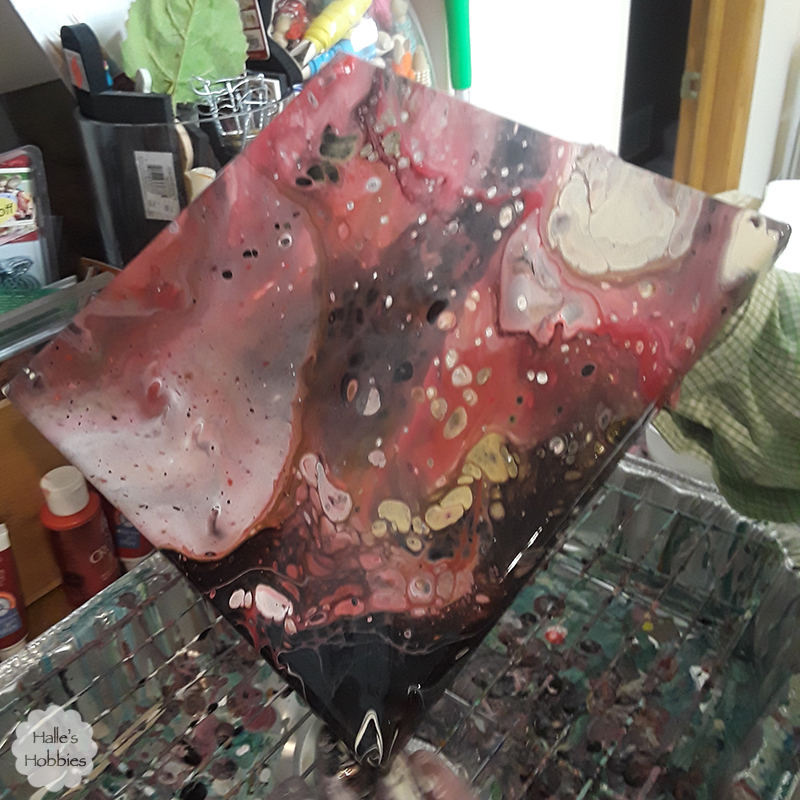
Some people quickly flip the cup over onto the canvas…I have yet to be brave enough to do that since I am working in such a small space. Instead I flip with canvas over.acrylic pour walk through

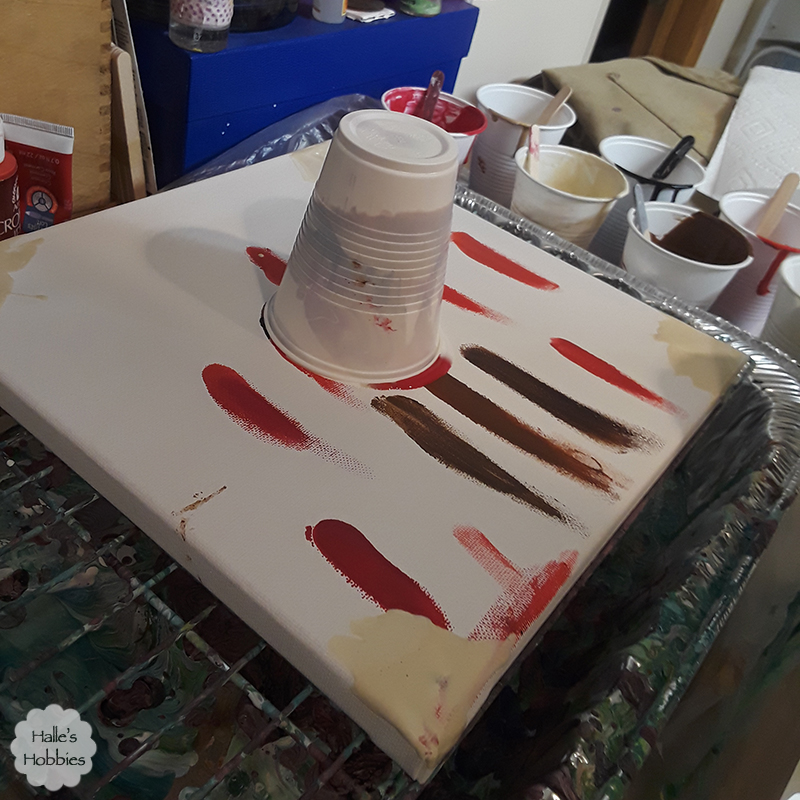
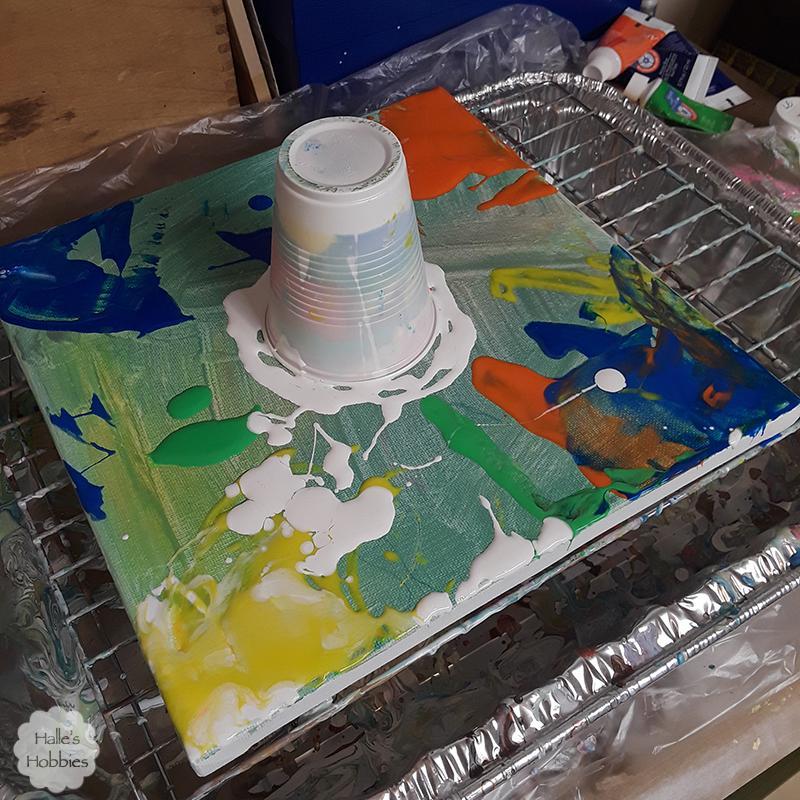
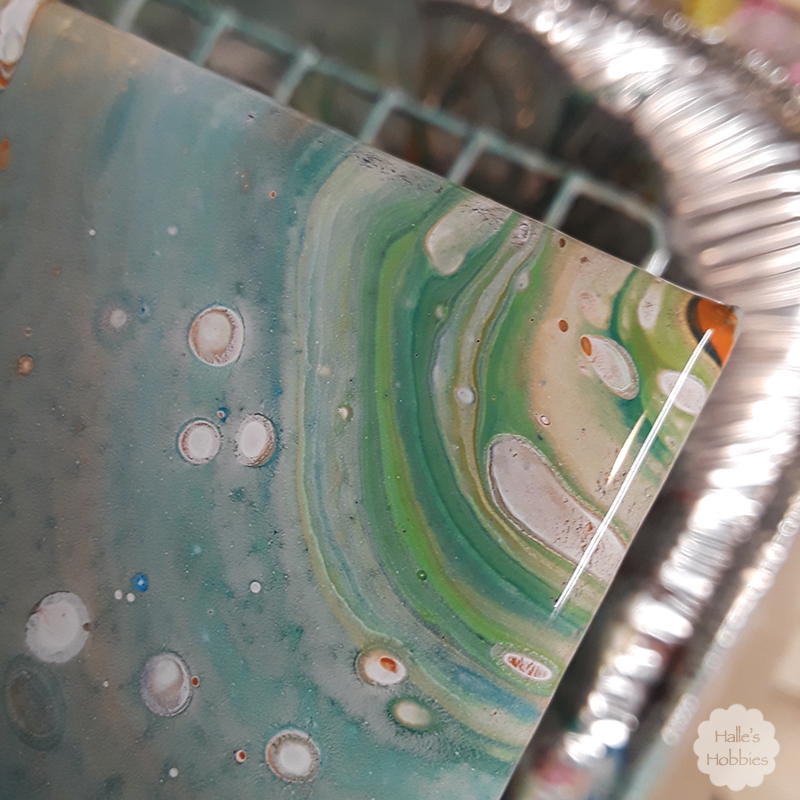
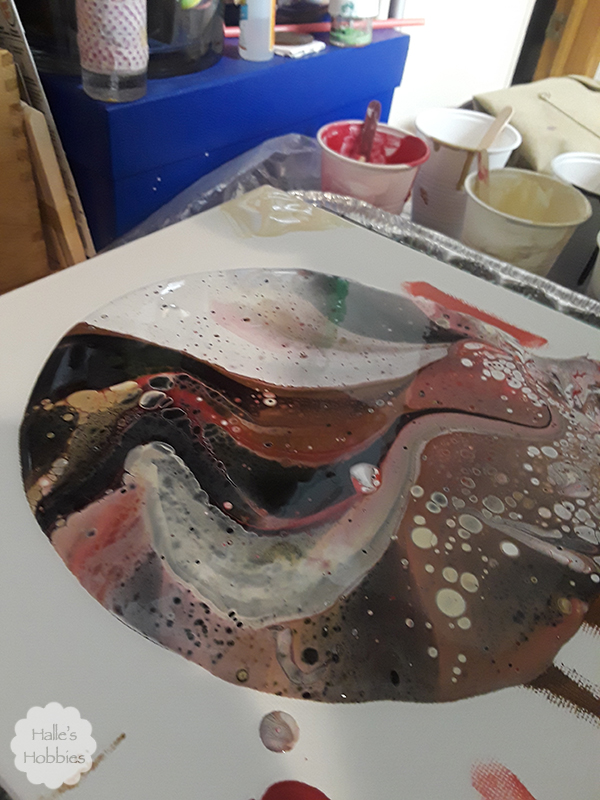
And now we wait a minute or so for the paint to settle. Not sure how necessary this is but its the way I do it. I also tend to put a little paint at the corners to get the pour to flow over the edge quicker.acrylic pour walk through

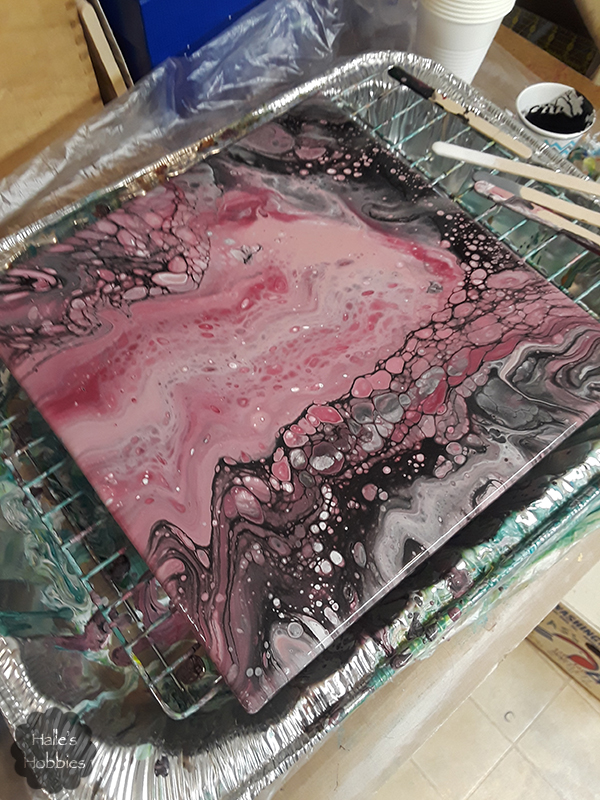
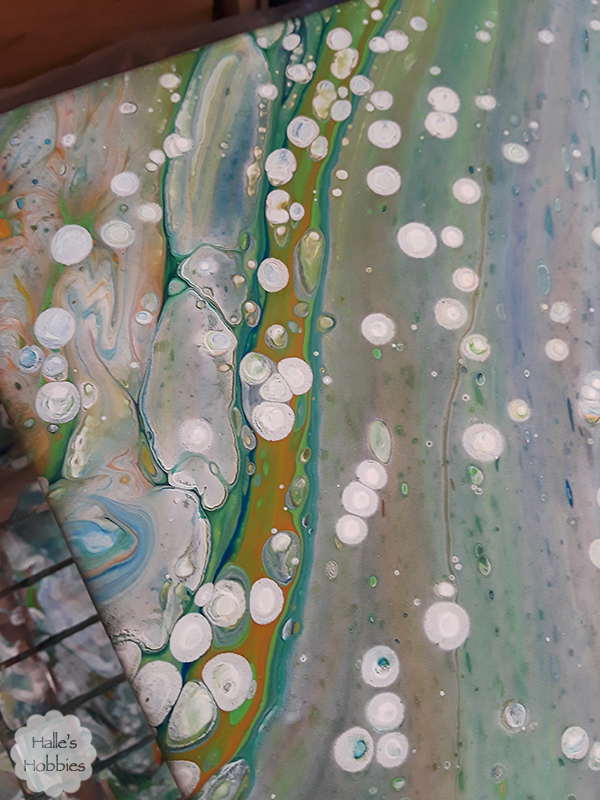
Every time I’m amazed by the designs that come straight from the cup.acrylic pour walk through

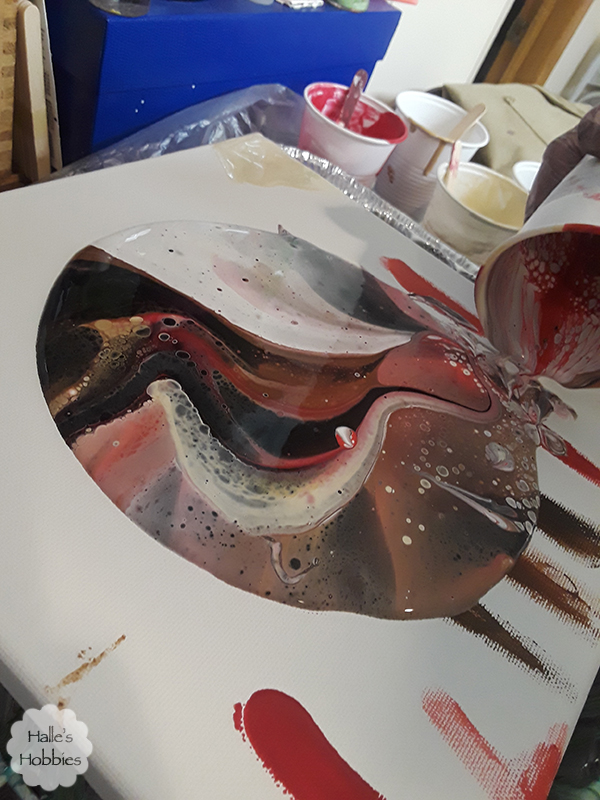
Already cells are forming from the paint bubbling up and popping. No silicone used or needed.

acrylic pour walk through

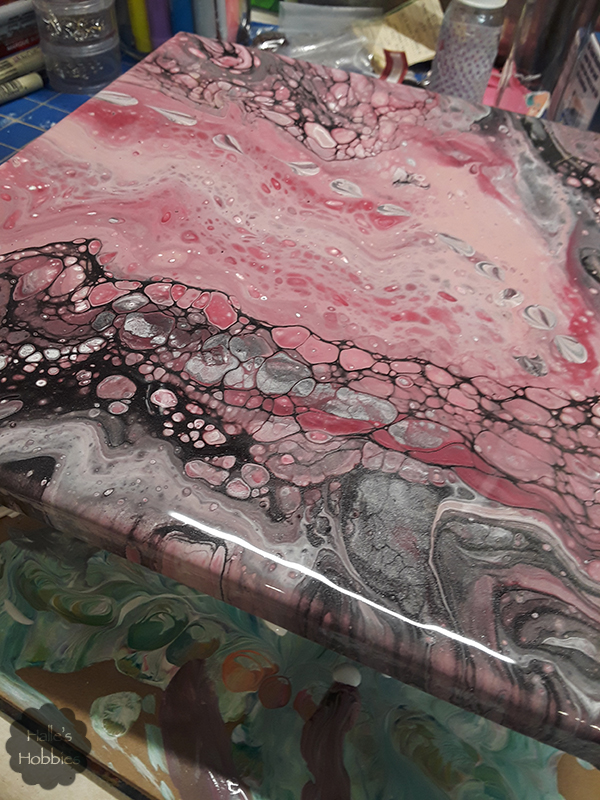
I sometimes lightly blow on the paint to pop the surface bubbles before tilting the canvas to begin the flow.
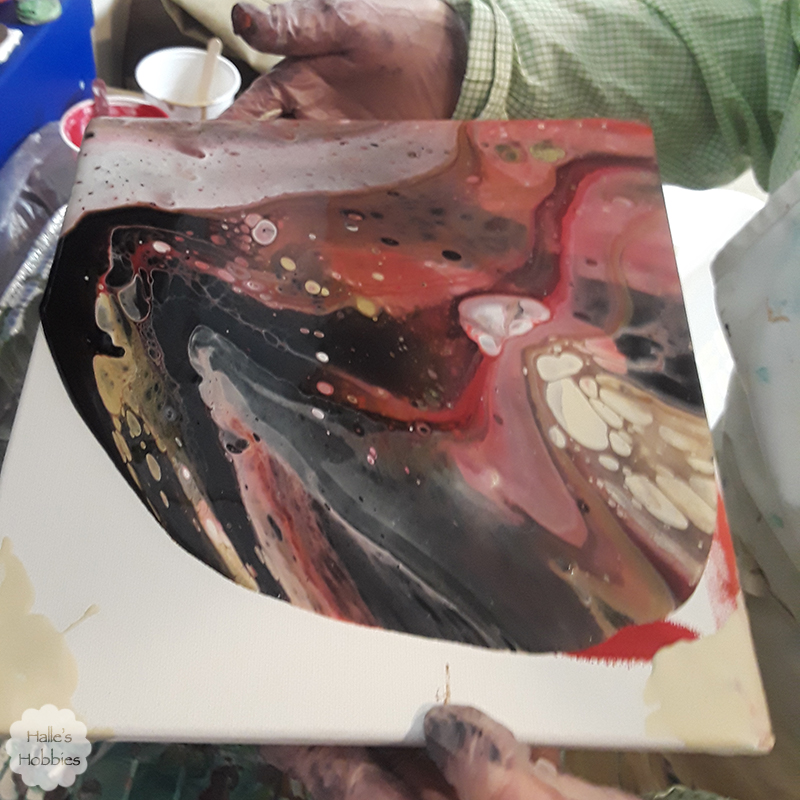
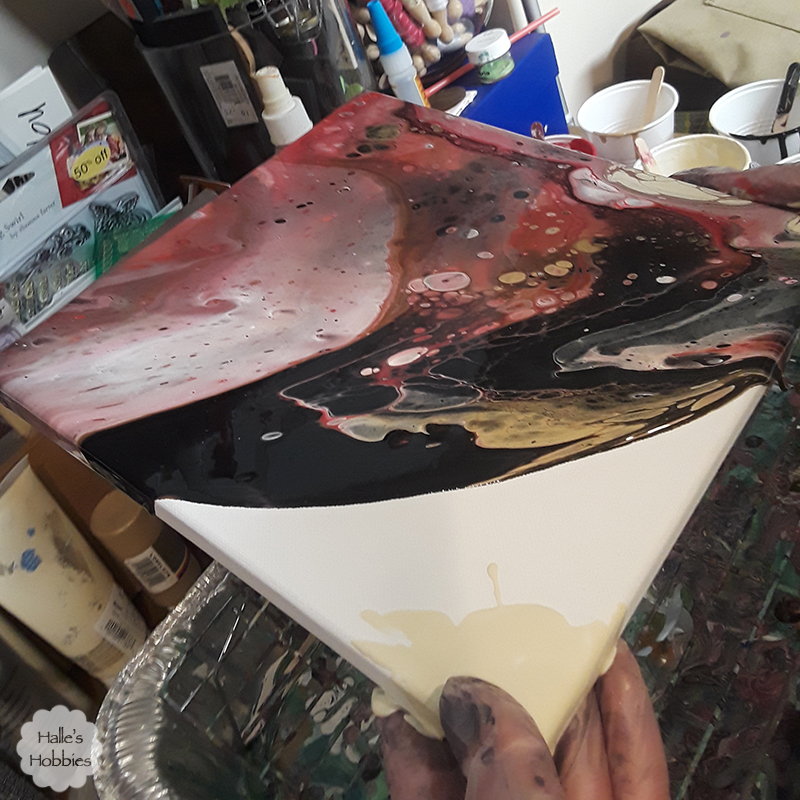
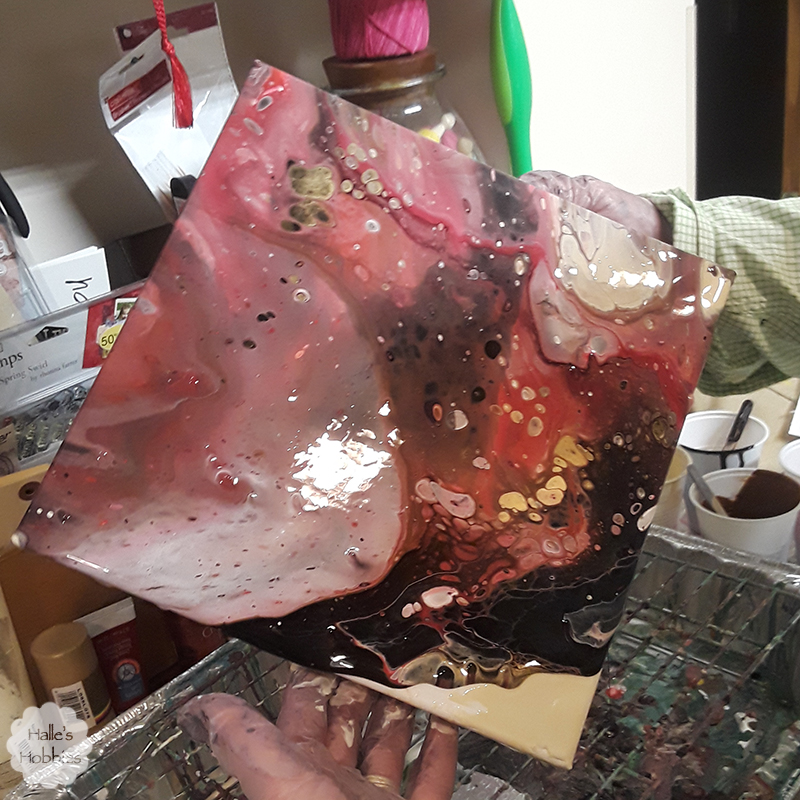
acrylic pour walk through

acrylic pour walk through

acrylic pour walk through

acrylic pour walk through

So much fun!!acrylic pour walk through

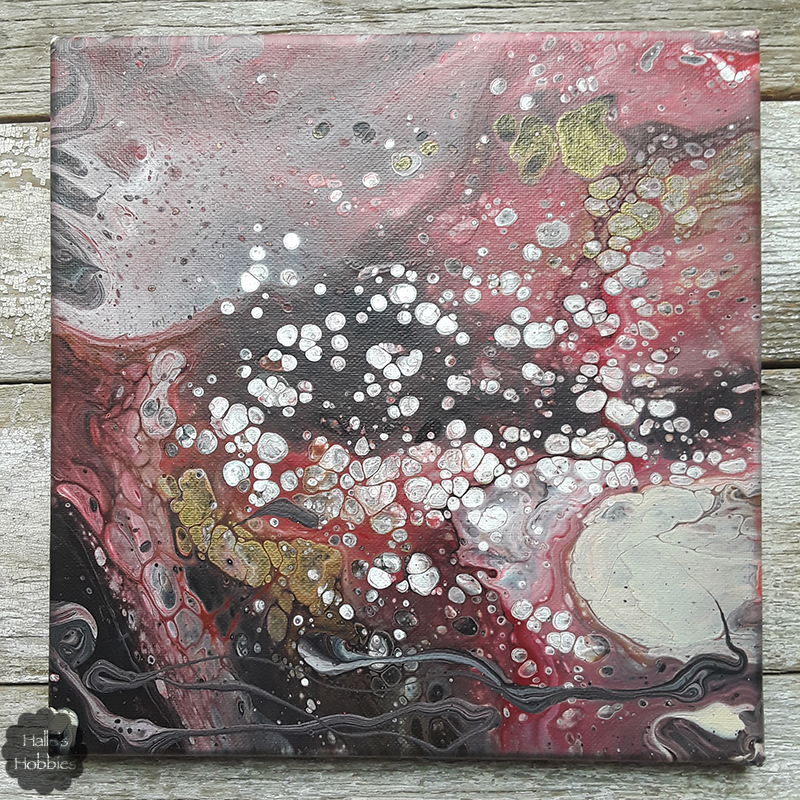
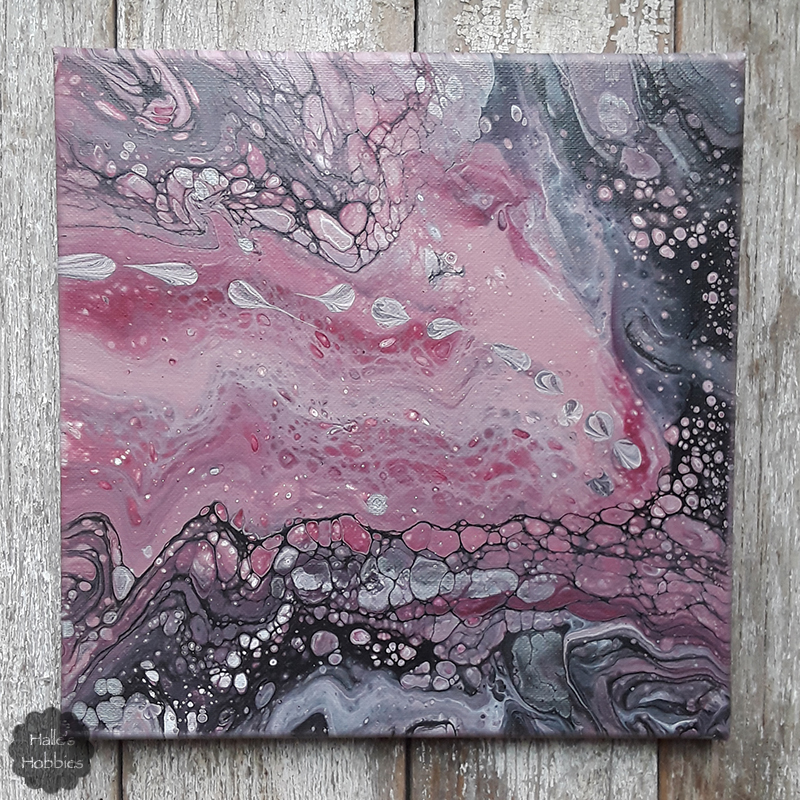
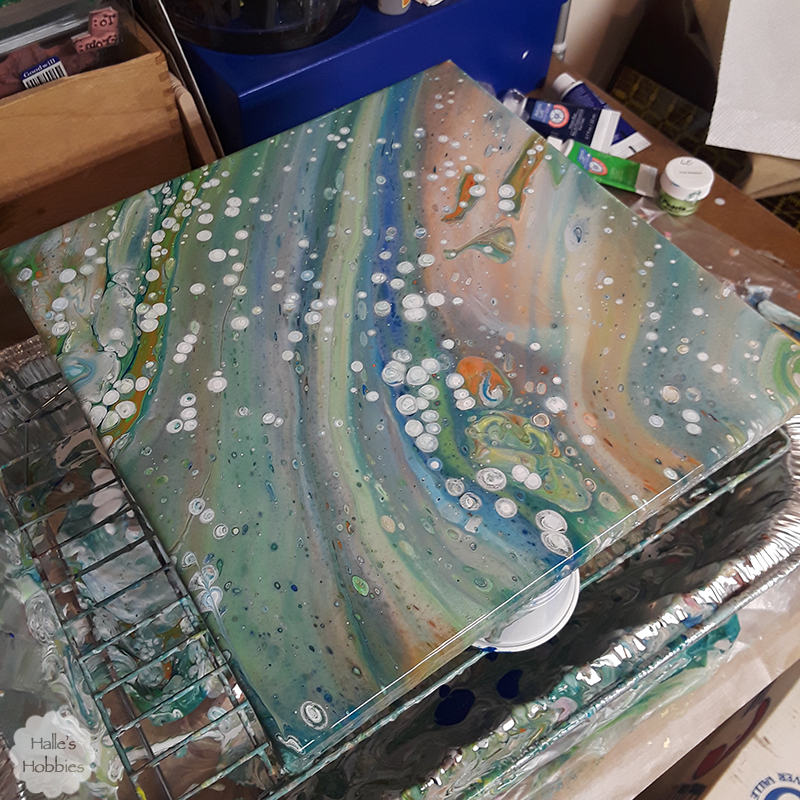
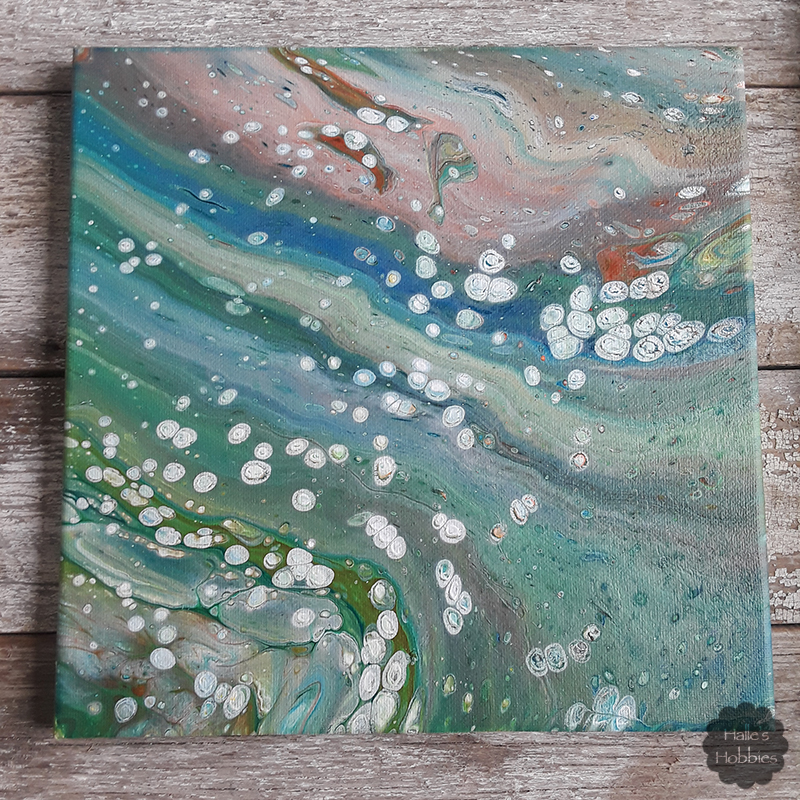
Here is the completely dry canvas. I did drizzle some paint left in the cup at the bottom of the canvas to add interest. Not sure if I entirely like that addition but its all a grand experiment.

Here is the second one I did with the same colors.

acrylic pour walk through

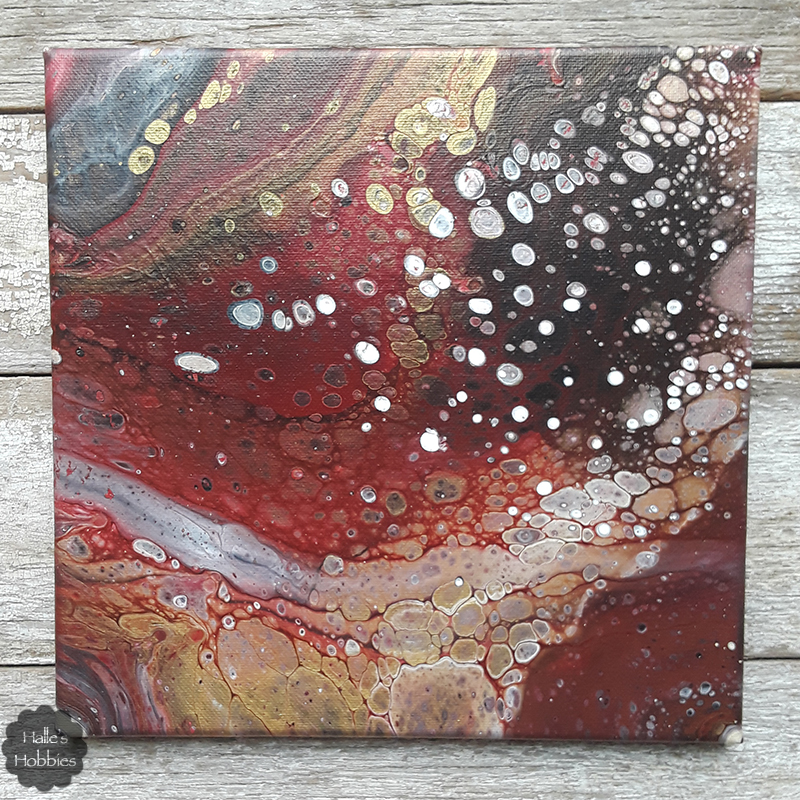
Crazy how different they are from each other. I love this this one…so does Mini-me. The colors work as a perfect accent in her room which was why I used them in the first place.

Special thanks to Mini-me for her photography during the process.

I’m obsessed with acrylic pouring again! It is so fun!! I have one to show you but three additional made. I just didn’t get photos taken before it too dark for natural lighting. Those will be in another post. In fact, mini-me acted as photographer for one so there are some in process shots. 

I decided on black, white, silver, burgundy wine and dusty rose for my paint pour.

So cool. I just can’t get enough of how these look.

I thought the area of pink was a little much of one thing smack in the middle so I used what was left in the flip cup to draw…drip…accent…a design.

They look a bit like striped tear drops meandering across the canvas.  After mini-me saw this one she asked for one for her room in specific colors. I mixed enough paint for two so she’d have a choice. Those I’ll show in the next post.

In case anyone was wondering…we had a two hour late start for school on Tuesday last week. They really should have cancelled in my opinion. We got 6 inches of snow overnight and then it began snowing in earnest again during the day. Made for crummy driving conditions. We decided to use just one vehicle that day…the 4 wheel drive one. I drove Mr. G to work, kids to school then got myself to work on time.

I started a new photo challenge for March. This one is definitely presenting more of a challenge.

Here’s what I have so far.

I’m stretching a bit with some of these and have fallen behind several days…then play catch-up all in one. Oh well. I’m not big on rules anyway.

What are you doing today?

Here we are getting hit with another blizzard on a scheduled Monday off school. What’s up with that?!?  Mr. G was even sent home from work early. The word came over the intercom that they were closing early due to bad weather. I know all of us are hoping for a snow day tomorrow.

So that’s the snowing but what is the pouring, you ask? Acrylic pours. Pour painting. Fluid art. Whatever you’d like to call it. I just call it fun! It totally fits into my love of creative chaos and randomness.

This was the start of a second pour in one day. (You can see the other in my previous post.) I also used white in addition to these bold basic colors,

I used a dirty flip cup technique. Sounds awful doesn’t it? It’s truly not though. Well…truth be told it’s a messy process. I scraped out my mixing cups on the canvas as not to waste them. Having paint at the corners helps it flow over the edge more easily.

Crazy huh?!? The white circles were caused by air bubbles. So cool!

BTW- I didn’t use any silicone or a torch in my process. So many people do and get absolutely amazing results. I’m just not interested in having flammables in my basement. Perhaps when the warm weather comes around I can try that outside.

I love the look of these paintings when they are wet. They have so much depth. 

The dry version is so flat. I plan to put a gloss coat on to bring out some depth again and brighten the colors.

I also need to share the end of February photo a day challenge results.

23. Depth of field

24. Architecture

25. My Face

26. Need/Want  (got my T Tuesday beverage covered)

27. Something Old

28. Street 

I’ve started the photo a day challenge for March as well. This month seems a little more challenging so far. I may have chosen the wrong one for me. Time will tell.


Hopefully *fingers crossed* we’ll have a snow day tomorrow otherwise it will be a typical Tuesday for me after we dig ourselves out. UGH!

What are you doing today?

Since I knew I had a three day weekend I decided to eek out a bit of time to try out acrylic pours again.aka unicorn poop

I have seen amazing results using the three primary colors. I decided to go in a slightly different direction…just slightly. I used colors you’d typically find in your ink jet printer….plus white instead of black.aka unicorn poop

Sorry this one is blurry…I had paint on my gloves and couldn’t focus it. After flipping the cup onto the canvas I poured the excess white around the outside of the “unicorn poop” paint puddle. Amazing how many colors I already have.aka unicorn poop

After tilting and draining off excess paint I set it aside to dry, coming back occasionally to wipe the drips from the underside of the canvas.aka unicorn poop

I love the little bubbles that come up through the layers and pop revealing other color.

Here’s the completely dry canvas. The colors are much less vibrant in matte form. Perhaps I’ll put a coat of gloss varnish over top to brighten things up.

I’ve got another basically dry and yet another freshly poured canvas. I’ll share those in another post.

These last few weeks of summer have us trying to squeeze every bit of summer fun and activities that we can. We’ve already started the school ramp up. Orientation yesterday…during the second half of the eclipse…nice timing people. At least it was raining like crazy at that time so no one cared.

Speaking of the eclipse…did anyone see it? I built a couple boxes in case the clouds cleared. We got peeks at it as it was eclipsing.

The clouds rolled in thick enough to obscure our view minutes before the greatest point of totality in our region. It was very strange though….the temperature suddenly dropped and the crickets started chirping. So awesome…just wish we could have seen as well as felt it.

The eclipse reminds me that I should show you my still work in progress of the acrylic pour project.

Somehow I seem to have lost the chipboard 3 overnight….I’m guessing Marvin had something to do with that.  I think I’m going to paint the numbers either white or black…leaning towards white. Then seal the whole works before attaching the clock parts.

I’ve also been playing around with my button collection again…

I have some ideas for projects. More button stacks. I just love how they look.

Over the weekend we had an evening that was just perfect for a fire. Hot dogs for dinner anyone?

As I waited for the fire to get going I checked out the garden. Late summer has done a number on some of the plants.

Such as the pumpkin  plant..totally dead and gone.

The green beans have totally taken over. I’m surprised since they were really poor early in the season….which is completely opposite of the last few years. I’ll definitely have some spicy beans to can.

And diced tomatoes as well.

Since the thick humidity, as seen here over the weekend, has finally cleared out. I’ll likely tackle the canning today in between playing taxi driver of course.

What are you doing today?

Ever heard of acrylic pours? I hadn’t until a couple months ago. I watched endless streams of YouTube videos on the process. It looked like something I could totally get into given time, space and willingness to get messy. Two out of three aren’t bad.

I did manage to eek out some space to at the very least make due so I could try this out.

My very first attempt I used red, orange, yellow and white with Golden polymer gloss medium. Some videos use silcone or WD-40 in the mix as well but I am not a fan of using any sort of aerosol in the house especially in my minimally ventilated basement. acrylic pour

I’m pouring onto a previously used canvas board that I coated with gesso. I put a bit of white paint around the edges to hopefully assist with the paint moving all the way out to the edges.

acrylic pour

I did what is called a dirty pour. You dump each of the premixed paints into the pour cup in alternating fashion. I really had no idea what I was doing so I just poured them as I felt like at the moment. I then turned the canvas board upside down over the cup and flipped the whole works over. Flip cup technique OR dirty flip cup technique as some have coined.

acrylic pour

I was amazed at what happened. The colors mixed and migrated. Color bubbled up from underneath.

acrylic pour

It was mesmerizing. Even the paint that flowed off the edge was beautiful.

acrylic pour

These colors made me think of agates…especially Lake Superior agates.

acrylic pour

When I moved the canvas to allow it to dry I ended up losing some of the magic. I fear the secondary location wasn’t completely level so more paint rolled over the edge than I had wanted.

acrylic pour

Here is the end result. A little more pink than I’d hoped but interesting none the less.

I’ve created several more and even took a video of part of the process on one attempt. I’m pretty sure its my favorite end result. It’s so darn fun. I’m experimenting with cheaper pouring medium. I’ve only had one big failure and guess what!?  I just did another pour straight over the top of it.

More to come…I promise.

PAGE TOP

© 2007-2024 Halle's Hobbies All Rights Reserved -- Copyright notice by Blog Copyright