• Blog - Creativity

    Sharpie tie dye

    When we got the materials for our retreat they said that we’d be doing a tie dye project so we brought our pre-washed white shirts along.  I had anticipated standard tie dye…rubber bands, string and dipping in dye baths or squirt bottles.

    tie dyeWhen we got to the building we found out that it was tie dye with Sharpie Markers and rubbing alcohol. I’ve wanted to try this technique since Elizabeth blogged about it. Of course, there are always so many techniques and so little time.

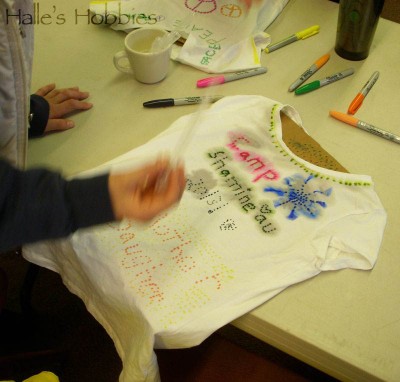
    It’s a very simple process…you just make dots. Seriously. You can create what ever you want.  I’m sure you could draw as well but dragging the marker on the material isn’t always the easiest.We had a piece of cardboard between the layers of the shirt so it wouldn’t bleed through to the back.

    We did learn that certain colors of Sharpies spread more than others. Not sure why. Also the bigger the dot…the more it spreads. As well as the more alcohol you put on the further is spreads.

    sharpie tie dye

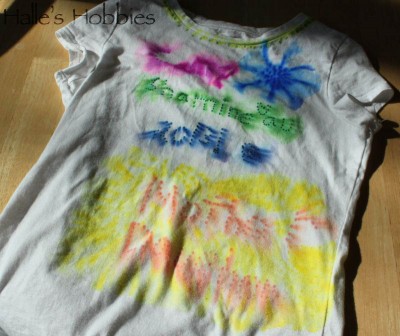
    Fun and much less messy process than dye baths.

    ~~~~~~~~~~~~~~~~~~~~~~

    I also wanted to say “thank you” once again to Patty for the wonderful birthday surprise. Look at the sweet package of goodies I came home to on Sunday.birthday gift

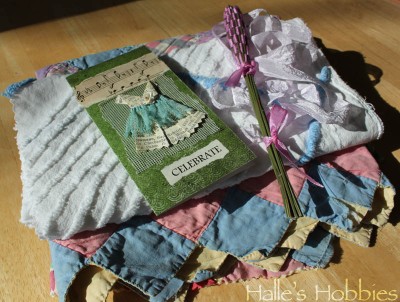
    Patty was kind enough to share some of her “new” quilt pieces with me and one of her lovely looking and smelling lavender wands.

  • Blog - Crafts - Creativity - Tutorials

    Recycled T-shirt bags

    t-shirt

    First of all, I have to admit that this is not my original idea. I’ve seen many versions of this on Pinterest.    box pleat

    But after going through the kids clothes and coming up with 2+ garbage bags full to pass along to a friend, it inspired me to keep a couple school shirts for this project.

    This project couldn’t be an easier. I turned the shirt inside out then stitched the bottom closed.  Next was the box pleat to create a flat bottom. Basically you sew perpendicular to the bottom seam at each corner. You end up with a triangle of fabric that is not usable bag space. Gosh, I think I’m making that more complicated than it really is!! Here’s a link that shows the process if I just confused you.

    Anyway…then I turned the shirt back right side out and cut off the sleeves and made a scoop cut at the neckline. No pattern just start cutting. We all know what a plastic handle bag from the grocery or discount store looks like….that’s what you are going for in shape.

    All in all, not too shabby for a few minutes work. It saved a couple of shirts from the rag pile since  they’d likely never be worn again.

    Little J claimed the lime green one as soon as she returned home. It was her shirt to begin with so now it will continue to serve her in a different capacity.

  • Blog - Creativity - Tutorials

    Upcycled t-shirt scarf

    While cleaning out my closet this week, I discovered this chartreuse t-shirt. It was destined to be donated  since I just couldn’t get used to the color on me.
    I had seen a tutorial on Pinterest for a fringed t-shirt scarf so I figure…why not try it.

    So back to my project. I cut the shirt below the arms then cut fringe about half way up the shirt.
    I then tugged on each fringe until it stretched nicely giving it nice texture and movement.
    And the completed scarf…
    I think I can handle a splash of chartreuse much better than a whole shirt of it.
    Sorry that each of my photos are a different hue. The actual color is somewhere in between this photo and the previous one.  Bad photo day for me and Photoshop can only do so much.