Tag : tutorial

17 posts

Since we have entered April, which happens to be Earth Month…or at very least the month that we honor Earth day…I thought it fitting to “recycle” one of my upcycling posts for Second on the 2nd.

Take a look….

2/22/2013 Recycled T-shirt Bags

t-shirt

First of all, I have to admit that this is not my original idea. I’ve seen many versions of this on Pinterest.    box pleat

But after going through the kids clothes and coming up with 2+ garbage bags full to pass along to a friend, it inspired me to keep a couple school shirts for this project.

This project couldn’t be an easier. I turned the shirt inside out then stitched the bottom closed.  Next was the box pleat to create a flat bottom. Basically you sew perpendicular to the bottom seam at each corner. You end up with a triangle of fabric that is not usable bag space. Gosh, I think I’m making that more complicated than it really is!! Here’s a link that shows the process if I just confused you.

Anyway…then I turned the shirt back right side out and cut off the sleeves and made a scoop cut at the neckline. No pattern just start cutting. We all know what a plastic handle bag from the grocery or discount store looks like….that’s what you are going for in shape.

All in all, not too shabby for a few minutes work. It saved a couple of shirts from the rag pile since  they’d likely never be worn again.

Little J claimed the lime green one as soon as she returned home. It was her shirt to begin with so now it will continue to serve her in a different capacity.

~~~~~~~~~~~~~~~~~~~~~~~~~~~~~~

Won’t you join me for

Welcome to the first edition of Second on the 2nd of 2019. It’s fun to look back and re-share posts from the past. Since my focus lately has been journals I thought I’d re-post a tutorial I wrote about one of the ways I prep a vintage book for altering. The altering after this point is completely up to you.

Take a look…

2/8/2015

Since I was starting a new journal I thought I’d share with you my process for prepping the book.  First find yourself an old book that appeals to you. For me it was the size of this book. Not too small or too big… Just call me Goldilocks.journal prep5

Look inside to see what kind of binding you have.journal prep1

This inside cover gave me a really good indication that I had a sewn binding but I had to make sure.journal prep4

Yep…sewn binding. Perfect! Now we’re ready for the thinning of pages without leaving chunks of torn pages along the inner spine. Removing pages reduces bulk since the altering of a book whether journal style or a themed altered book adds lots of bulk!

I find the center of each signature (as seen in the above photo) and remove the page from each side.journal prep3Like this. I go back and carefully pick out all of the torn fragments. It will appear as if nothing has changed until you look at the page numbers. You’ll have a definite gap which would make reading the story a real challenge at this point.

I remove at least one page from each signature, sometimes more. You can always go back and remove more. journal prep7

Here you can see the gaps along the spine and how the book is more narrow going toward the outer edge. This is exactly what you want. journal prep8

You have a nice stack of pages for your altering pleasure when you are done.

~~~~~~~~~~~~~~~~~~~

So here’s an after photo of the completed Gypsy journal.

Thanks for stopping by for Second on the 2nd.

Today’s second look is one of the very first tutorials I had ever written. I had Mini-me, who was 6 at the time, take photos of me during the creation process. She did a really nice job! She still has an eye for photography.

Take a look….

FYI….this was published on Blogger March 2009. My formatting was definitely different way back then.

As requested by a few members of ABC I’ve taken pictures along the process of making my latest ATC book. I’ll do my best to explain the steps. Please click on the pictures for a better view of any step.

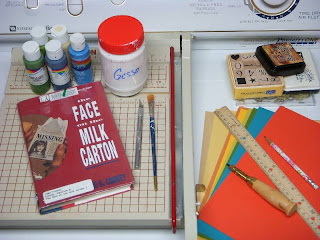
These are the supplies you’ll need as well as some string or fiber and a large eye needle for the binding process as you’ll see later.

After being properly scolded by Elizabeth, here is the supply list:

  • book large enough to fit your ATC’s
  • x-acto knife or other cutting blade
  • gesso
  • pencil
  • ruler
  • cardstock
  • cutting system such as guillotine or fiskars rotary cutter
  • white glue or gel medium
  • paint
  • paint brush
  • tissue paper or dress pattern(optional)
  • rubber stamps(optional)
  • ink pads(optional)
  • Japanese screw punch or awl
  • thread or fibers for binding
  • large needle
  • decorative beads(optional)
  • something to protect your work surface
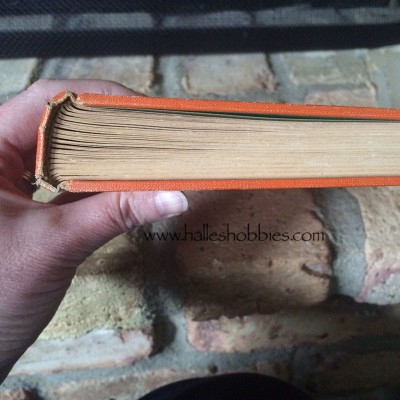
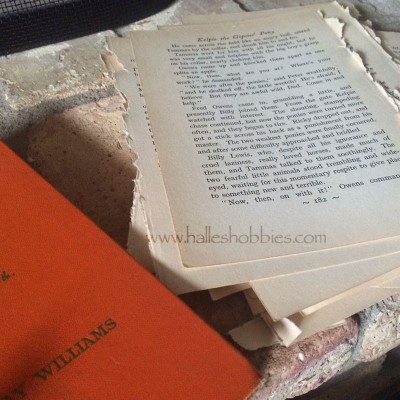
The first step is to remove the text block from the cover. To do this you carefully cut along the spine on each side of the text block being careful not to cut through the cover. I used a glued in binding book so I had to use a bit of muscle to separate the glued in block after cutting. I reinforced the spine with a strip of cereal box cardboard adhered with gel medium although I’m sure white glue would work as well.
Next I coated both sides of the cover with gesso and set aside to dry.

In the meantime I measured the text block to determine the size of the cardstock that I’d be cutting.

For my book, I cut 16 pieces to 3.75″ x 10″. This will eventually yield 4 signatures but now I’m getting ahead of myself.

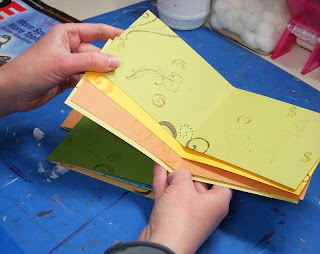
My next step is purely personal preference. I randomly stamped both side of my pages for visual interest.

After folding in half, I used a bone folder (forgot that in the supply photo as well) to make a nice sharp fold.

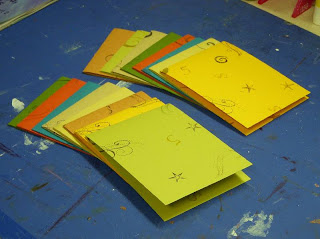
Completed pages ready to be gathered into signatures.

I used 4 pages for each of the 4 signatures…boy, that was a lot of fours!

At this point the gesso on the cover had dried and I was ready to make them pretty. I love using dress patterns for texture. As an added bonus it acts as a reinforcement. I simple spread out white glue and pat the pattern tissue gently down then set aside to dry.

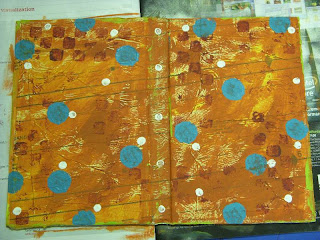
After it dried, I painted the inside.

Used the same technique on the outside with scraps of pattern tissue.

And again painted and set aside to dry.

While the cover was drying, I prepped the signatures for binding. I made a template from scrap cardstock as my guide for hole punching.

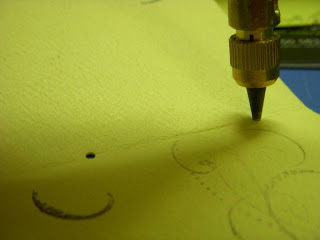
I used a Japanese screw punch for my holes. You could also use an awl. You just don’t want the holes too big. I’m using the smallest bit my screw punch came with. BTW-the hole gets plugged when cutting through multiple layers. I keep a needle near by to dig out the tiny little circles plugging the punch.
I used my guide to make the holes in the book binding as well.

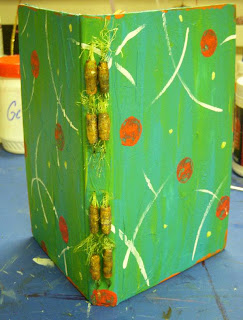
And punched 4 sets of 3 holes in the binding.
I started with an 18 in fiber on a large needle in the center hole from the inside of the signature leaving yourself a 4 inch tail.

Go through the outside of the book cover, slip in a bead then go back through the top hole in the cover and signature.
Next go back through the center hole to the outside, slip on a bead and then go back through the remaining hole of the set.
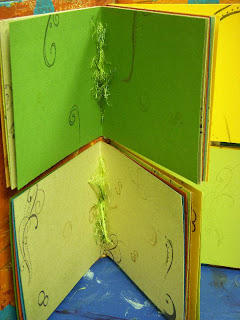
It should then look like this. Take the needle and go under the complete flat loop then tie the loose ends tightly in a knot. You’ve just completed your first signature. Go back and do it 3 more times.

The way I do the pamphlet stitch binding isn’t exactly that way the tutorials out there would have you do it but it’s the way I do. I’d encourage you to do a search and check out the other techniques if mine seems unclear. There are video tutorials out there as well.

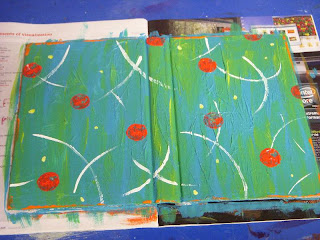
Completed book outside..in poor light.

Completed book inside.

A few end notes…

  • I made sure my book was large enough to accommodate ATC’s in portrait and landscape orientation.
  • Be sure to leave at least 1/8 space between the 2 sections of pages so they actually turn.
  • Keep in mind that you’ll the book will become twice it’s size or more once the ATC’s are loaded. I use photos corners to mount my ATC’s.
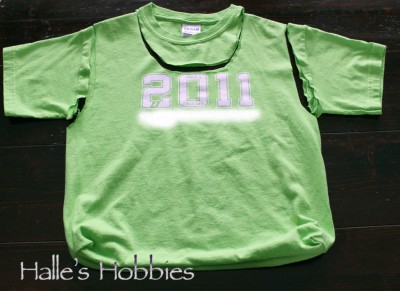
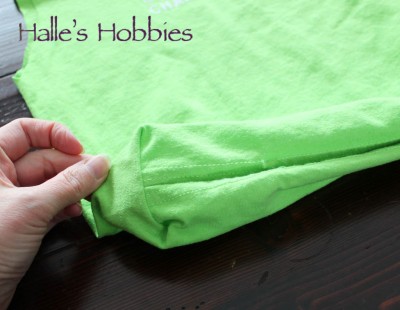
I know its taken a while but I’m finally going to show you how I do my acrylic pours.  (This is a photo heavy post)acrylic pour walk through

Lets talk about the colors I used first off.  I use all brands of paint, even house paint for my pours. I really only care about the color I achieve in each cup. I mixed the 2 browns until the color felt right. I did the same with the 2 reds in the right of the photo.

acrylic pour walk through

In all I have 7 colors. As I’m mixing these I add a product called Floetrol, which is a paint conditioner. I plan to use some of this in my paint for the front door…hopefully eliminating my brush strokes.

acrylic pour walk through I use about a 50/50 mix of paint and Floetrol. I eyeball it…this girl doesn’t measure. If the paint is still quite thick (which is almost always is) I add distilled water very slowly until I get the proper consistency. For me that is the paint running in a thin line from my stir stick. acrylic pour walk through

Now comes the dirty pour part. I always start with a small amount of white in the bottom of the cup then begin adding streams of color in a varied order. I pour from different heights which distributes the color in the cup in different ways.acrylic pour walk through

As you can see I tried out colors from my paint drawer on the canvas before preparing my cups. It doesn’t matter what is on the canvas before so feel free to reuse an old canvas. After filling the cup with enough paint or what I assume is enough…remembering that some paint will be poured off the edge in this process….I’m ready to pour or flip as the case may be.acrylic pour walk through

Some people quickly flip the cup over onto the canvas…I have yet to be brave enough to do that since I am working in such a small space. Instead I flip with canvas over.acrylic pour walk through

And now we wait a minute or so for the paint to settle. Not sure how necessary this is but its the way I do it. I also tend to put a little paint at the corners to get the pour to flow over the edge quicker.acrylic pour walk through

Every time I’m amazed by the designs that come straight from the cup.acrylic pour walk through

Already cells are forming from the paint bubbling up and popping. No silicone used or needed.

acrylic pour walk through

I sometimes lightly blow on the paint to pop the surface bubbles before tilting the canvas to begin the flow.acrylic pour walk through

acrylic pour walk through

acrylic pour walk through

acrylic pour walk through

So much fun!!acrylic pour walk through

Here is the completely dry canvas. I did drizzle some paint left in the cup at the bottom of the canvas to add interest. Not sure if I entirely like that addition but its all a grand experiment.

Here is the second one I did with the same colors.

acrylic pour walk through

Crazy how different they are from each other. I love this this one…so does Mini-me. The colors work as a perfect accent in her room which was why I used them in the first place.

Special thanks to Mini-me for her photography during the process.

Lately I’ve been feeling the urge to make another quilt. A fun, random scrappy quilt. A real scrap buster quilt.  I have several totes full of fabric. I’d say about 1/3 of it dates pre 1980’s. Of course not old enough to be really cool retro fabric…just that awkward 70’s fabric that really doesn’t mesh well with today’s patterns. However I do believe it will work well in a scrappy quilt because it will be small pieces and hey, its scrappy.

One of my main issues with quilting in my current space is that I don’t have room for both a cutting station and small ironing board. It’s one or the other so usually I set up my tabletop ironing board on the game table and am constantly walking back and forth.

sewing space

Marvin is also an issue. He is not good about obeying the rule of no cats on the table. It’s a constant battle with him. I’m afraid he’s going to either burn himself or knock the iron down and have it burn the carpet. Either way it’s bad.

While browsing around at Goodwill I saw this wooden TV tray for $3.99 and was inspired to create my own ironing board that is perfect height for ironing while remaining seated and folds away when not needed.

DIY workstation ironing board

I knew I needed special batting for this project. I researched a bit then found the product I needed on Amazon.

DIY workstation ironing board

At this point I turned my TV tray upside down onto the batting and traced around. I then cut another piece of batting about 2 inches bigger so it would wrap around the outer edge of the tray. I then cut a piece of vintage tablecloth about 3 inches bigger than the previous batting piece. I just eyeballed all the pieces….you know me, I hate measuring.

DIY workstation ironing board

I used a staple gun to attach it to the underside of the TV tray in the same way you’d upholster a chair seat. You basically alternate stapling from side to side pulling the fabric tight as you go leaving the corners for last. The corners are mitered by folding then stapling. There are lots of tutorials and how-to videos out there for this if you’ve never done it before.

DIY workstation ironing board

After getting the fabric stapled down good and tight I used my scissors to trim away any extra. The underside isn’t really ever going to be seen so I don’t care if it’s perfect.

DIY workstation ironing board

Ta-da! Now I have my new work station ironing board and no excuse not to get to that scrap busting quilt.

DIY workstation ironing board

Or have I just made an upholstered cat stand? What a turkey!!

It’s grad party season…that means is card making time too. This year I decided it might be fun to use the school colors for each of the graduates especially since both of them are really active in athletics.

I searched around on Pinterest for inspiration. I saw a few cards featuring tassels and thought that would be really fun. In fact it was the tassel in particular that prompted me to look up their school colors so it would be more meaningful.

school colors graduation card

I used my Cuttlebug with the Sizzix Bricked embossing folder to give the texture to the white layer of cardstock. It added that “school” look I was going for.  The tassel is embroidery floss. They are quite simple to make. I wrapped the floss around a card until I had the desired amount…personal preference here. I slipped a length of floss through the top and tied a knot. I then cut the bottom and pulled the card out. I cut another length of floss and tied it around bundle approx 1/4 inch from the top.  I poked a hole in the hat and threaded the top strings through and taped it to the back of the hat before mounting. I trimmed the ends nice and even to the desired length after attaching the hat. The hat was made using a 2 inch square punch which I then adhered with 3M foam mounting tape.  I also used the foam tape under the congratulations banner for interest.

I have one more card to create but that one will be blue and yellow instead of the black and gold. I think I may create a few more in our school colors as well as long as I have the supplies out. I know I’ll be needing the eventually.

I’ve been loving all the new and creative wreaths that are showing up in home decor, magazines and of course Pinterest. That being said…I have to admit I’m not a big fan of seasonal decorating. Not that I don’t love it when it’s done but it’s exhausting. The unpacking, placing, fussing, moving and dusting only to have to start the process over again in what perhaps a month. And don’t even get me started on storage of said items!!

I decided that a decorative wreath could be just that…decorative…without being seasonal if done right.

I love the look of burlap… It’s neutral yet interesting with the texture. A great base. I did a search on YouTube to find out how to create my base.

This was an excellent video.

So I purchased this wreath base…

wreath base

and this roll of burlap and set to work.

The video was perfect and helped me create the basic burlap wreath.

burlap wreath

Now came the fun part. Figuring out all the elements I wanted to include. Off to Michael’s!

monogram burlap wreath | Halle's HobbiesThe monogram was from the dollar section and sort of set the tone. Knowing it would end up somewhere in our livingroom, I wanted to find colors that would blend nicely.

monogram burlap wreath | Halle's Hobbies

After adding the items I purchased, I decided to include several of my paper flowers. I loved how they made sense with script the monogram and tied the elements together quite nicely.

monogram burlap wreath | Halle's Hobbies

I simply love how it turned out! It’s a little more feminine than I had intended but it has the vintage feel that flows throughout our livingroom.

I love having access to a creative communities both in real life and online. Elements and ideas from the multitude of wreaths inspired my own unique creation.

How do you use online creative communities such as blogs, forums and Pinterest?

  • Step by step direction to create the exact item you fell in love with?
  • Inspiration?
  • Something to get you started?
  • A resource?
  • ??


PAGE TOP

© 2007-2024 Halle's Hobbies All Rights Reserved -- Copyright notice by Blog Copyright